 |
|||
|
|
|||
|
|
|||
| ||||||||||
|
|
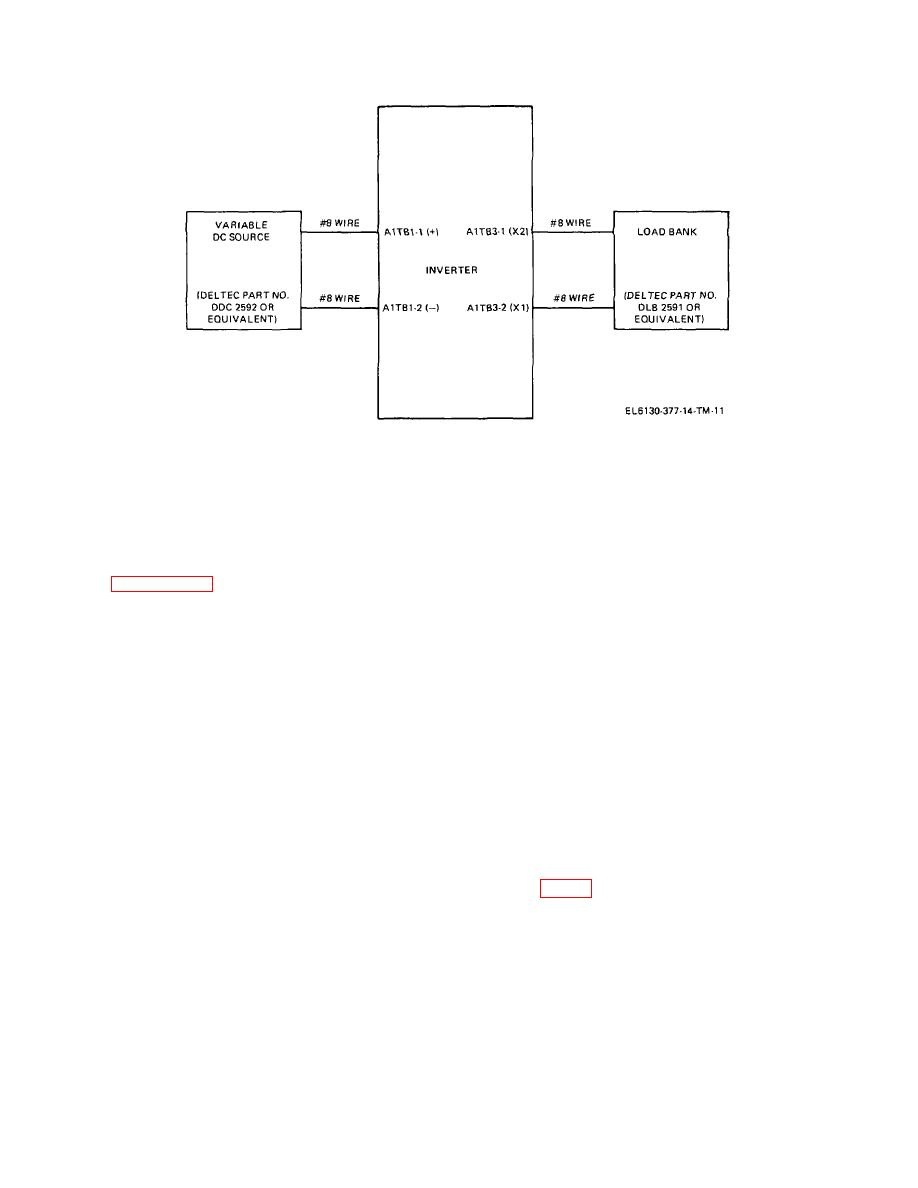 TM 11-6130-377-14
Figure 6-2. Performance verification and adjustment test setup.
Section
III. REPAIRS
the original wiring. For harness cabling, cut the old
6-7.
General Parts Replacement Techniques
conductor as short as possible without removing it from
The procedures required to remove or replace piece
the harness. Dress the new conductor along the
parts and nonrepairable assemblies which are not
harness and spot tie it to the outside of the harness.
obvious or require the removal of one or more parts are
Make connections to same terminals used in the original
given in paragraph 6-7. The following precautions apply
wiring, even where there are alternatives which appear
when removing, replacing, or repairing parts in the
electrically equivalent.
inverter.
a. Before removal or replacement of any part
g. Make well-soldered connections, using no more
unless otherwise stated, remove power from the unit.
solder than is necessary.
A carelessly soldered
Restore power to the unit after the part has been
connection may create a new fault and is one of the
replaced.
most difficult faults to find.
b. Tag all hardware and components during
removal procedures for correct identification during
Do not allow a soldering iron to come into contact with
replacement procedures. Before a part is unsoldered,
insulation or parts that might be injured by excessive
note the position of the leads. If the part has several
heat.
leads, tag each of the leads before unsoldering any of
i. Do not disturb the setting of any uncalibrated
them.
control without redetermining its proper setting before
c. When removing a defective part, be careful not
returning the equipment to service. If any switches are
to damage leads or other parts by pulling or pushing
operated, return them to their original positions.
them out the way.
6-8.
Inverter Repairs
d. When replacing a part, install the new part in the
same position as the original. Use an exact duplicate
whenever possible.
a. SCR Thyristor A1Q1 (A1Q3) or A1Q2 (A1Q4).
e. Use a pencil-type soldering iron with a 25-watt
(1) Position DC circuit breaker to OFF.
maximum heating capacity. If the iron must be used
(2) Open front indicator panel.
with ac, use an isolating transformer between the iron
(3) Remove twelve screws and lockwashers
and the ac line. Do not use a soldering gun; damaging
securing the top cover and remove the cover.
voltages can be induced in the equipment parts.
f. If wiring must be replaced, use leads of the
same length and gauge if possible. With the exception
of harness cabling, run the leads in the same manner as
Change 1
6-7
|
|
Privacy Statement - Press Release - Copyright Information. - Contact Us |
